Native American Crafts Southwest
Kachina Doll |
|

Background Information
The Pueblo thought Kachinas were ancestral spirits who returned with the clouds and rain to help their people. Over 300 different Kachinas were believed to exist. Pueblo Indians believed that these spirits once lived among the people, but they became offended when not enough attention was paid to them. Before leaving the Kachinas taught their people to dance. Pueblo held religious festivals and ceremonies in which they asked the Kachinas to bring rain and make their crops grow. They used drums and rattles in the dances during the ceremonies. They often danced in masks and chanted. When a boy turned 13, he was invited to the kiva where the identity of the Kachinas was revealed to him. Girls were not brought to the kiva, but they were also told the secret of the Kachina.
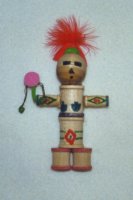
Directions for a Wooden Spool Doll
For each doll purchase:
- 2 1 ½ by 5/8 inch spools
- 2 ½ by 5/8 inch spools
- 2 3/16 by 7/8 inch spools
- 1 3/4 inch wooden ball
- small feathers
- scraps of craft foam
-
Using a glue gun, glue the two 1 ½ by 5/8 inch spools together to form the body. Glue the ½ by 5/8 inch spool to the bottom of the body to form the legs. Next glue the two 3/16 by 7/8 inch spools in the arm positions. Add the 3/4 inch ball to the top to form the head.
-
Decorate the doll with magic markers.
-
Glue feathers, foam craft shapes, and odds and ends to add the finishing touches.
Masks |
   |
  |
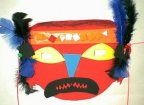
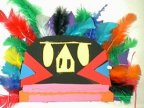
Directions for masks
-
Have each student draw a mask pattern onto a piece of paper by folding a piece of 8 ½ by 11 inch piece of paper in half and drawing half a face. Cut the pattern out.
-
Unfold the pattern and trace it onto a 8 3/4 by 11 3/4 inch sheet of Foamies Fun Foam.
-
Cut of the Fun Foam with regular scissors. Be sure to cut eye slits, nose holes, and a small hole on each side of the mask for a string to hold the mask into place.
-
Decorate the mask with Foamies Fun Foam Cutouts, feathers, beads, and other interesting objects.
-
Insert a twenty inch piece of string on each side of the mask into the hole that was cut earlier.
-
The mask may be worn by tying the two pieces of string around the head.
Weaving |
 |
Background Information
Around 1600 the Navajo women began to spin and weave wool. The sheep belonged to the women and the horses belonged to the men. The women sheared the sheep. Navajo women learned from the Pueblo how to weave. The early rugs they made were usually striped straight across. Later the women learned to weave a stripe on a slant and to make a diamond shaped design. The first rugs the Navajo made were dyed with leaves, berries, and insects. The frame of the loom was made of four long poles and set up outdoors except in the winter. The rug or blanket was never wholly completed or perfect because the Navajos believed it would offend the spirits.
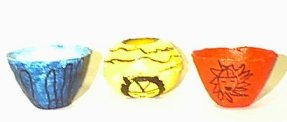
| Pottery
|
 |
 |
| Sandpainting |


 |
|
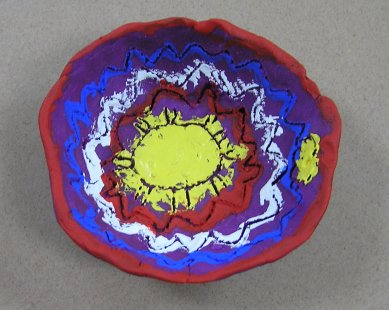
Background Information
Sand paintings were constructed on the floor of the hogan by sifting various powdered herbs, sand, and other powdery material. The sick person was given a special herb to drink and told to sit in the center of the dry painting. The shaman touched the head of the figure then touched the patient’s head and chanted. This was repeated with each part of the body. The sand painting was removed before sundown and buried beneath trees that stood to the north, south, east, and west of the hogan. If the patient died his/her body was taken out a new door broken through the north side of the hogan and the hogan was burned.
Directions for Sandpainting
- Using double-sided tape, have the students make a design on a piece of construction paper. Because the tape has a protective waxy paper on one side of the tape it may be torn from the dispenser and easily cut into the desired shape. Once a piece of tape is cut into shape, have the student press in onto a piece of construction paper. Tell students to leave the waxy paper on the tape until later.
- To make the sand painting have students remove the protective waxy paper from one area at a time.
- Rub the tape with the colored sand until the tape is completely covered.
- Repeat with all areas of the sand painting design until the tape is completely covered by the colored sand.
- While the students are working on their sand paintings read to them a book featuring the Navajo Indians.
| Baskets |
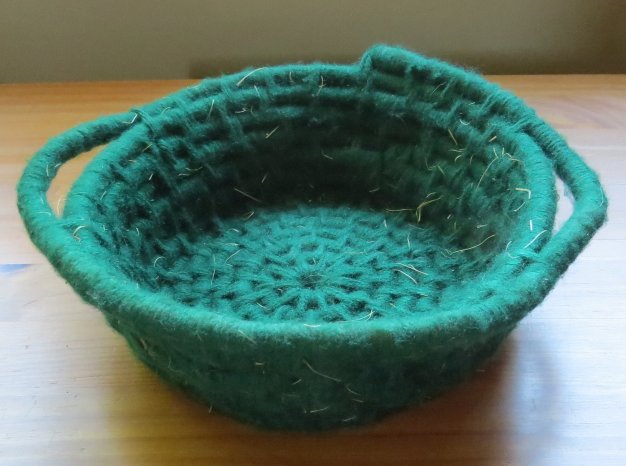 |
Background Information
The Apache women packed all their possession each time they traveled to a new home in baskets. The baskets could hold heavy loads. They hung the baskets across their back and shoulders. The baskets were made from different plants, reeds, and herbs. The Apache mainly used yucca leaves, willow reeds, or juniper bark. Flowers from plants were used to make dyes for painting designs on the baskets. They Apaches used the coiling and twining technique.
Have students make a simple coiled basket. (Note this project takes about 7 to 8 hours to finish. Students may get started in class, then finish at home, or they may work on the project during story time over several weeks.)
Directions
Materials
- one scan of yarn per student (Variegated yarn works well.)
- 20 to 25 foot piece of 3/4 inch wide Sisal rope per student
- upholstery needles
Directions
-
Cut the yarn into 3 to 4 yard lengths.
-
Begin wrapping the yarn about 3/4 inch from the end of the 20 to 25 foot piece of rope working towards the end to get started. Then continue to wrap the yarn overlapping where you already wrapped.
-
Continue wrapping the yarn around the rope while twisting the rope into a circle shape.
-
When the rope forms a complete circle, wrap the yarn 5 times around the rope then wrap it two times in the center of the circle formed by the rope. Five times around the rope, then two times in the center of the circle. Continue wrapping the rope. Every 3/4 inch go into the center twice until you have three complete circles of yarn wrapped rope.
-
While forming the next six to eight circles wrap the yarn two around the rope in the circle you just formed instead of going all the way to the center of the circle.
-
After six to eight flat circles have been formed, the next layer of rope is angled up to form the sides of the basket.
-
When the yarn runs down to 2 inches on the needle, slip the needle under the last inch of wrapped yarn. Rethread the needle with a new length of yard. Then slip the yard under the same inch of yard going in the opposite direction being careful not the pull the yarn completely through so that the new yarn ends up in the same place where the last piece of yarn ran out.
-
Continue working until the entire 20 to 25 foot length of Sisal rope is covered with yarn.
| Indian Necklace | 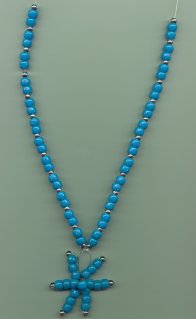 |
Background Information
The Navajo started working with silver in the late 1800's. First they hammered Spanish and Mexican coins into silver buttons. The buttons were cut from the clothing and used as money. After the Treaty of 1868 the Navajo were given specialized tools for silver smiting. The silver was later made into jewelry with turquoise stones. Have students string turquoise and silver colored beads onto wire to have the have a necklace similar to the one above.
Indian Stamped Wall Art
Drum |
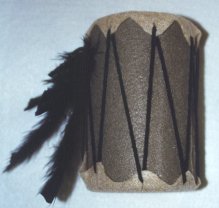 |
Directions
- Gather the following materials:
- one empty salt container
- felt
- yarn
- feathers
-
Wrap a piece of felt around the salt container. Glue this felt into place.
-
Cut two pieces of felt in a waving zigzagged circle pattern to look like a piece of deer skin. The circles must be approximately 1/2 to 1 inch bigger in diameter than the top of the salt container. Glue one circle to the top and the other to the bottom of the salt container.
-
Cut a small hole in each of the longer zigzags of the circle pieces of felt which have been glued to the top and bottom of the salt container.
-
Weave yarn through the holes in the felt going from the top to the bottom of the drum each time.
-
Decorate the drum with feathers.
| Turtle Shell Rattles |  |
These were made from plastic butter tubs. After adding dried beans to the bowl a piece of poster board was taped to the top. A turtle shell design was drawn onto the plastic tub (bowl) with a black permanent marker, then painted with acrylic paints so it would resemble a turtle shell. A piece of felt was taped to the cardboard so that the rattles could be tied onto the student's legs for a "snake dance".
| Rattle |  |
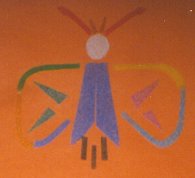
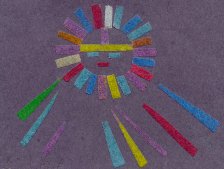
| Pueblo Drawings
After reading Arrow to the Sun the students drew characters from the book in the same style the artist had drawn. Notice the bright colors. |
 |
Click the images to go to the individual Native American craft pages.